This week, we’re excited to feature a guest blog from our friends at Snowball Creations. Max and his team have deepened our understanding and knowledge about paid advertising, which supports our team in finding great ideas to bring to life. We’re excited to feature their expert knowledge on the topic of setting up your first campaign. Enjoy!
So, you’ve created a truly glorious video that educates your target audience of who you are whilst also putting a smile on their face!
You know that getting this video in front of people is all that’s needed now and Facebook & Instagram ads are the place to be. Over 2 billion humans spend several hours of their days on the platforms!
But you’re new to Facebook ads and so don’t know where to start. WTF is Facebook ads manager? Daily budget vs lifetime budget? What’s a pixel? What you need is a simple Facebook ads tutorial to hold your hand and help you launch your first campaign built around your great new piece of content.
Well, you’re in luck. In this article, I will walk through a simple step by step tutorial for Facebook ads, all the way from setting up your FB page to hitting the launch button on your campaign!
This article is based on my experience managing Facebook & Instagram ads, as well as other paid channels like Google, for a large variety of clients across many years, with my agency Snowball Creations.
This stuff works. So let’s get into it…
(Note: Facebook, the parent company that owns both Facebook and Instagram, is slowly rebranding to Meta. I’ll still just refer to them as Facebook in this article as it’s what we know!)
Step 1: Get Prepared
Set up a Facebook page and Instagram account
Firstly we need to set you up with a Facebook page and Instagram account. These are needed for you to run the ads across both the Facebook and Instagram networks. You run ads to both of these platforms when working from the Facebook Business Manager.
Follow Facebook’s own guide here to complete this step.
Then for Instagram, go ahead and create your own Instagram profile. You do this by downloading the app and signing up just like a normal user. Here’s a guide on how.
Then you’ll need to switch your personal account to a business account.
Lastly, you will want to connect your Instagram account to your Facebook page.
Great! Your Meta network is ready to go!
Sign up and set up ‘Business Manager’
We now need to get a Business Manager account set up with Facebook. This is sometimes called Facebook Ads Manager as it’s your ads manager for Facebook & Instagram!
To create your Facebook ads manager account follow this guide.
Once this is set up you will also need to create an ad account, add payment details to your ad account and possibly add some other users/colleagues too.
(Note: When adding new users make sure to also give each of them access to manage the various assets of the business manager account like the Facebook page, Instagram account and pixel as without that Facebook won’t let that person create campaigns using them.)
Create and connect your Facebook pixel
If you’re after just views on your video or looking to generate traffic, and aren’t bothered about following what happens to users after they leave Facebook, then you can skip this step. I would personally always recommend it. For any business, it’s a great source of data that proves useful in many ways!
From your business manager settings, you will also want to create a Facebook pixel. This is how you are able to track what users do once they leave Facebook and go to your website.
With e-commerce, there are great integrations with stores like Shopify that make this very simple. The easiest path is to head to Shopify and in the sales channels section, you can connect Facebook to your store. See Shopify’s docs here on how.
Outside of this if you are a B2B business or anything else then you’ll likely want to set up the pixel within the Facebook ads manager. Here’s the guide on how to do this.
Verify Your Domain
One crucial step with the Facebook ads pixel that is often missed is to verify your domain. This sounds scary but I promise it isn’t so bad. Here’s a guide that shows you how.
Step 2: Create Your Facebook Ads Campaign
Now the ‘fun’ part (fun for someone that runs an ad agency anyway!)…
The structure that we’ll look to build will be assuming you have one primary video and a $1,000 budget to invest in your ads. If you have less budget ,I’d recommend reducing the number of ad variations in total. If you have more budget, you could look to add additional audiences or copy variations to the below plan too.
Here is what we’ll be looking to build:

Facebook Ad Copy Variations
Each copy variation will have a different headline and primary text to go with your video. Here are three angles to try:
- Direct sell copy – Focus on the direct benefits and value of your product or service.
- Review copy – Using a quote from a customer, partner or news piece about the company.
- Funny copy – Just try to stand out from the crowd and write an ad that your audience wouldn’t expect and leaves a smile on their face.
If you have more budget you could add a 4th copy variation, or if you’re starting with less you could drop down to 2.
Remember the copy supports your video and often is where you’ll set the call to action to drive conversions.
Your Facebook Campaign Audiences
For your 3 audiences to be tested your goal is to try to find your target audience within the Facebook ads network. The simple way to approach the targeting is by creating differing groups of interests.
For example, let’s say you’re an eco-friendly furniture brand with a lovely new video telling the story of the impact your brand creates. You could create one audience with Facebook users that have shown an interest in eco tourism and an interest in furniture.
Another audience could combine Facebook users who have shown an interest in veganism and furniture, as you have a theory that there’s a large overlap.
Combining multiple interests can work very well..
Most importantly, have a clear separation between each group with a theory that you’re looking to test. For example, in the above audiences, I have a theory that users who like ecotourism or veganism will also like eco-friendly furniture.
Altogether, you will aim to end up with 3 total audiences, one for each ad set. These 3 audiences will be the same across each campaign.
Other FB landmines to dodge
I’ll link below how to actually build the campaign within the ads manager but first let’s cover some of the important decisions to be made and landmines that Facebook loves to leave for you to waste some more of your ad spend!
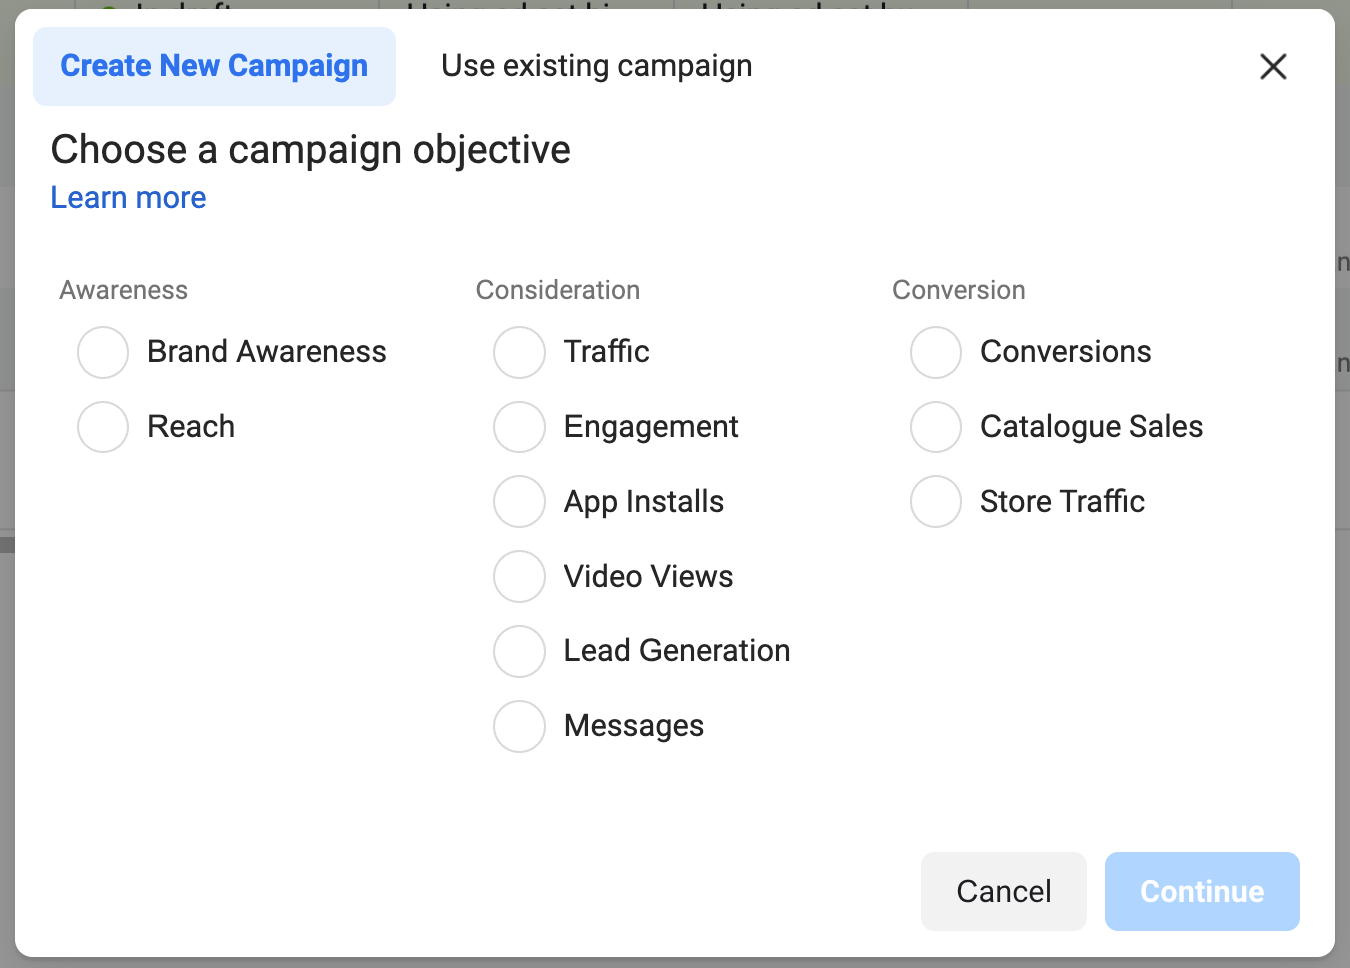
Selecting a campaign objective that’s right for you
When setting up your campaign you will set an objective within Facebook ads on what to focus your Facebook ad on. If you’re looking to just get as many eyeballs from your target audience on your lovely new video, then select ‘video views’.
Generally speaking though, you want to set the goal to be as far down the funnel as you can go. Something like a call booking form or an eCommerce purchase.
 Set budgets at ad set level, not campaign
When setting your budgets you want to split it evenly across each ad set level. Some choose to set budgets at the campaign level, but this lets Facebook ads use the money where it wants and Facebook advertising is often not actually very good at judging which ad set and ad has won out.
So avoid using campaign budget optimization and instead set a daily budget per ad set.
If you have a $1,000 budget per month you can divide that by 30 days to have $33.33 per day. Then divide this by the 9 total ad set variations so $3.70 per day per ad set.
Don’t use dynamic creative
Dynamic Creative is a feature by Facebook to let you add multiple options for any part of your ad which will then be automatically AB tested. The issue is the same as the above where Facebook ads manager doesn’t actually do a very good job of judging which has done best.
It often gives preference to a Facebook ad that has a higher click through rate and lower cost per click which is important, but not as important as conversions.
Turn off detailed targeting expansion
There is a small checkbox setting in your audiences setup called ‘detailed targeting expansion’, which Facebook auto ticks on. In our experience, it reduces the quality of the audience you’ve built. It ultimately is Facebook saying we’re going to just quickly move outwards from your targeting you’ve set and go to whoever we want.
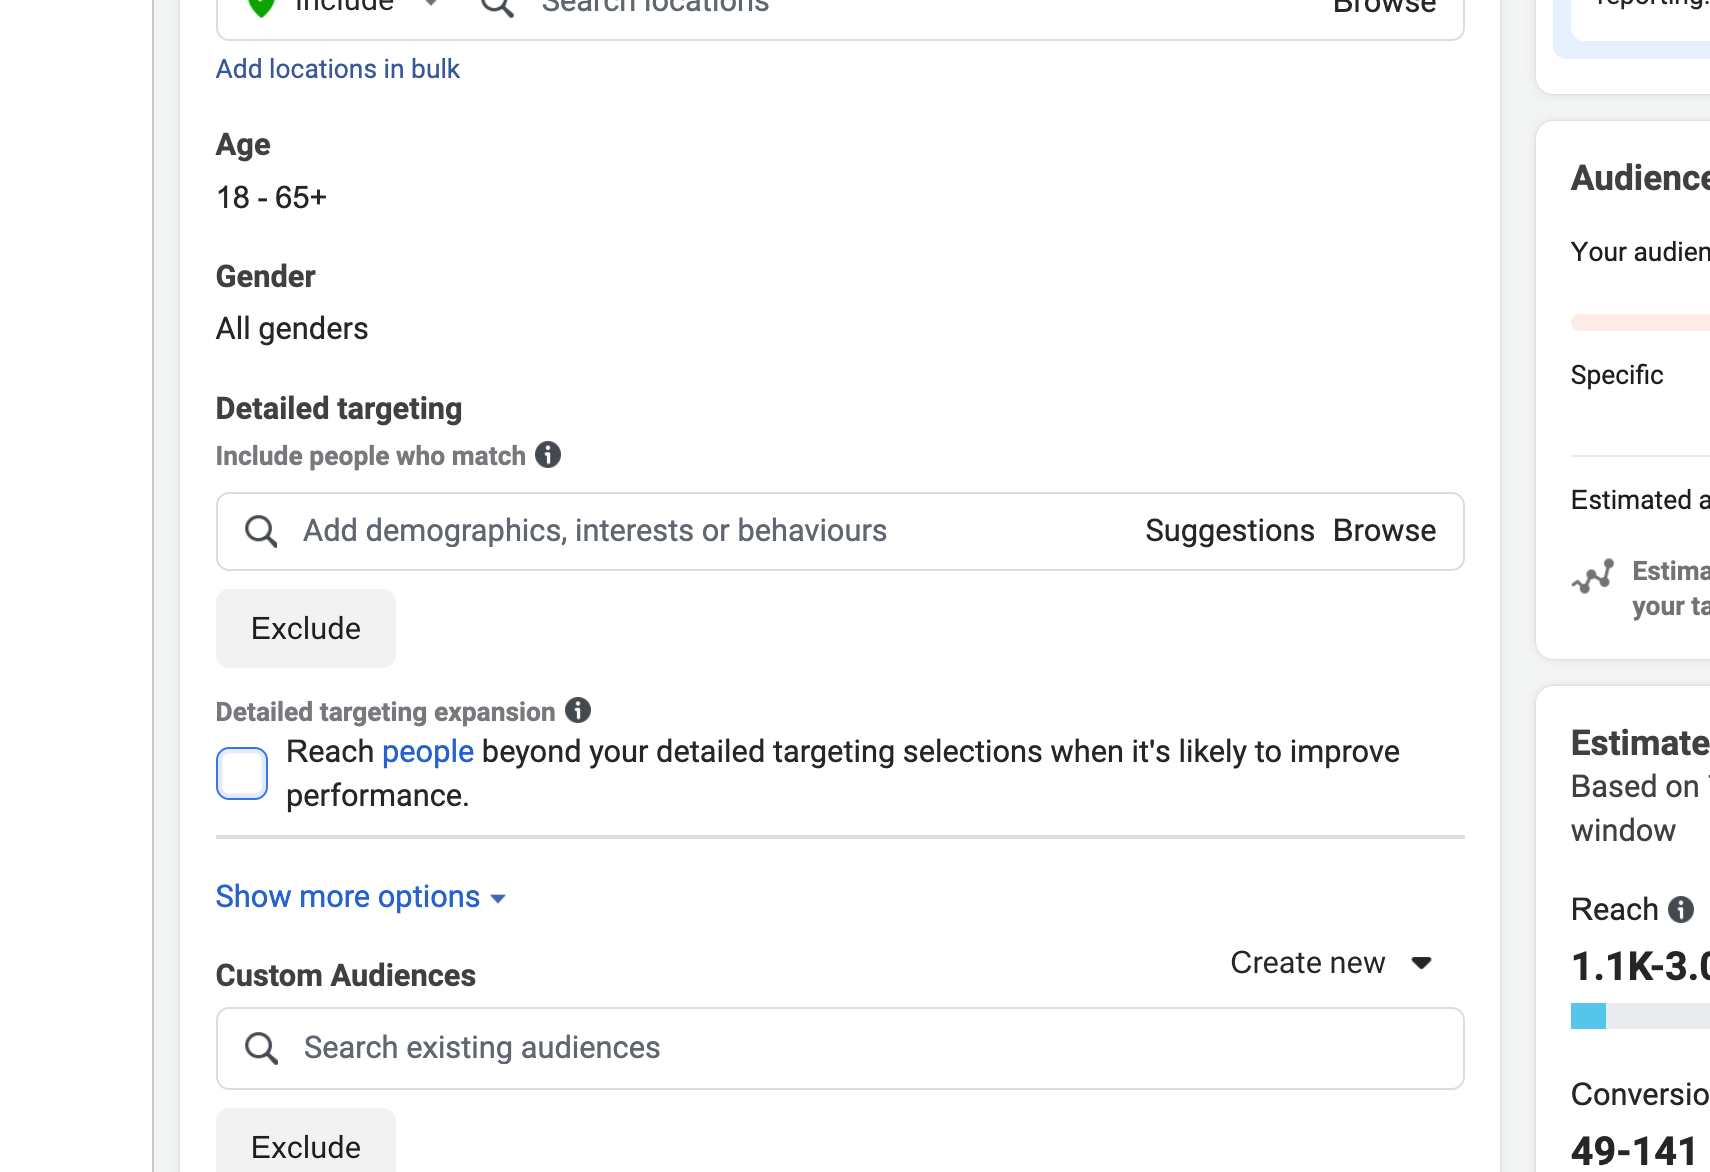 So turn it off for all ad sets.
The Facebook advertising machine will always try to push you to have less controls in place and leave more of it to them.
Use manual placements
We generally want to leave the audience placements open to let Facebook go to where it likes. However, audience network in particular is a lower quality audience that, from our experience, converts worse and so reduces your overall return on investment.
So click to manual placement and just uncheck ‘Audience network’
Building out the campaigns
For a full, up to date, step by step process on how to actually create the campaign, here’s a great guide to follow. Facebook advertising can feel daunting at first but is actually very user friendly.
Step 3: Hit the campaign launch button!
Your Facebook ads manager account is all set up. Your campaigns are built with a great matrix of different copies and audiences to be tested.
Double-check that the budgets are set correctly per ad set to add up to what you’re comfortable with.
Then hit that big publish button!
Don’t forget to analyze the results!
Make sure to follow the results of your campaign each day. After roughly a week has passed you can likely spot that maybe one of the copy variations just isn’t doing as well with a lower click-through rate, higher cost per click and fewer conversions.
Or perhaps one of the audiences is flying ahead of the others and so you could drop down to just that winner.
Ultimately you’ll slowly work to whittle the campaign down to just the best performing campaign, ad set and ad. This will leave you with the strongest possible ROI.
Step 4: Bask in the glory of your success
Your campaigns are running great. You’re monitoring them like a pro. This epic guide to Facebook advertising has done its job and you can sleep easy knowing your lovely new video is spreading far and wide through the Facebook/Meta universe!
This is only a taster into how to manage your ads. To keep learning you can find more helpful video content over on my Youtube. In particular there’s a great video I released detailing a simple checklist on what you need pre launching your ads.
Or need more personal support to go to the next level? Get in touch with me through my agency Snowball Creations.
Otherwise, I hope this guide has helped you and wish you all the luck!
Max Sinclair
We hope you enjoy some of our latest and greatest work at Next Day Animations, which Snowball Creations has helped us share far and wide. Thanks, Max, for your wonderful tutorial!
Don’t forget, you can always reach our fabulous client advisors directly at 202-747-0404 for a free quote and consultation.